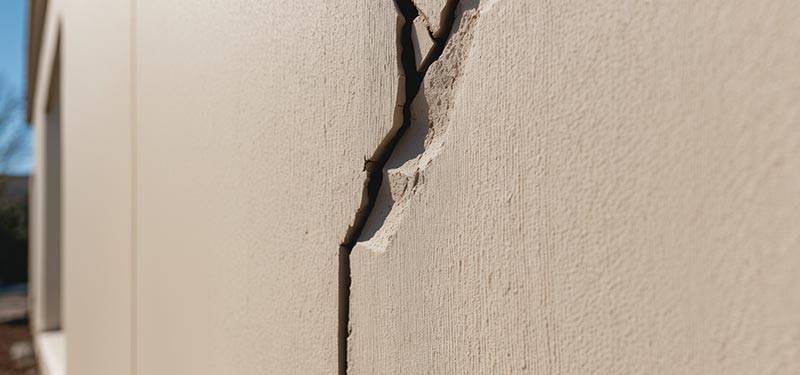
Stucco Crack Repair
Prompt stucco crack repair maintains your property’s structural integrity and aesthetic appeal.
This guide covers everything you need to know about repairing stucco cracks, including their types, causes, and step-by-step repair methods.
Jump right in:
- Types of Stucco Cracks
- Tools and Materials Needed for Stucco Crack Repair
- How to Repair Stucco Cracks
- Benefits of Timely Stucco Repair
Call +1 (780) 710-3972 if you have questions or need stucco repair services.
Types of Stucco Cracks
Stucco cracks are categorized based on their size and cause:
- Hairline Cracks: Typically less than 1/16 inch wide, these are common and result from minor settling or shrinkage.
- Structural Cracks: Wider cracks that may indicate underlying structural issues.
- Spider Cracks: A network of fine cracks often caused by improper application or curing of stucco.
- Diagonal Cracks: Found near windows and doors, usually caused by stress points in the building structure.
Causes of Stucco Cracks
- Temperature Changes: Expansion and contraction due to temperature fluctuations.
- Moisture Intrusion: Water penetration weakens the material over time.
- Improper Installation: Subpar techniques or materials during the initial application.
- Structural Movement: Shifting foundations or vibrations can stress the stucco.
Tools and Materials Needed for Stucco Crack Repair
To repair stucco effectively, gather the following:
- Premixed stucco patch or acrylic-based stucco
- Trowel or putty knife
- Wire brush
- Caulking gun (for cracks near joints)
- Sandpaper
- Protective gloves and goggles
- Sponge and water
How To Repair Stucco Cracks
- Inspect the Cracks
- Assess the cracks to determine their size and underlying cause.
- Consult a professional for structural cracks that may indicate deeper issues.
- Prepare the Surface
- Clean the area using a wire brush to remove loose stucco and debris.
- Wipe the surface with a damp sponge to ensure adhesion.
- Choose the Right Repair Method
- For hairline cracks, use a premixed stucco patch or paintable elastomeric caulk.
- Apply a stucco mix with a trowel for wider cracks to fill the gap.
- Apply the Repair Material
- Use a caulking gun or trowel to fill the crack evenly.
- Smooth the surface to match the surrounding texture using sandpaper or a sponge.
- Curing
- Allow the patch to cure according to the manufacturer’s instructions. Most stucco repairs require misting with water to ensure proper curing.
- Repaint or Refinish
- Once the repair is dry, paint the area to match the existing stucco finish.
Benefits of Timely Stucco Repair
- Enhanced Durability: Prevents further damage and extends the lifespan of stucco.
- Improved Aesthetics: Maintains the visual appeal of your property.
- Cost Savings: Early repairs reduce the need for extensive restoration.
Different Ways to Repair a Stucco Crack
Stucco cracks can range from minor hairline fractures to more significant structural damage. Each type of crack requires a specific repair method to ensure your stucco surface’s durability and aesthetic integrity. Below is a detailed guide to how you can repair stucco cracks.
1. Repairing Hairline Cracks
Hairline cracks are narrow, typically less than 1/16 inch wide, and often caused by natural settling or minor shrinkage. These cracks are mostly cosmetic but should be sealed to prevent moisture intrusion.
Materials Needed:
- Elastomeric caulk or paintable sealant
- Putty knife
- Sponge
- Paint (if needed)
Process:
- Clean the Crack: Use a damp sponge to remove dust and debris from the crack.
- Apply Elastomeric Caulk: Use a caulking gun to fill the crack with elastomeric caulk. This flexible material can expand and contract with the stucco.
- Smooth the Surface: Use a putty knife to smooth the caulk, ensuring it blends with the surrounding stucco.
- Paint the Area: Repaint the repaired area to match the existing surface once the caulk has dried.
2. Repairing Small to Medium Cracks
A stucco patching compound is ideal for cracks wider than 1/16 inch but less than 1/4 inch. These cracks may indicate slight structural movement but are still manageable with basic tools.
Materials Needed:
- Premixed stucco patch
- Trowel or putty knife
- Sandpaper
- Water and sponge
Process:
- Prepare the Surface: Remove loose stucco and clean the area with a wire brush and sponge.
- Apply Stucco Patch: Use a trowel or putty knife to fill the crack with the premixed patching compound. Press firmly to ensure the material adheres properly.
- Blend the Texture: Use a damp sponge or textured roller to mimic the existing stucco texture.
- Curing: Allow the patch to cure for 24–48 hours. Mist the area with water periodically to prevent drying too quickly.
- Paint if Necessary: Once cured, repaint the area to match the existing color.

3. Repairing Large Cracks and Structural Damage
Large cracks (greater than 1/4 inch) often result from significant structural shifts or improper installation. These repairs may require additional support to stabilize the underlying structure.
Materials Needed:
- Stucco repair mix
- Bonding agent
- Fiberglass mesh
- Trowel
- Sandpaper
Process:
- Assess Structural Integrity: If the crack appears to be caused by structural issues, consult a professional to address the root cause before repairing the stucco.
- Apply Bonding Agent: Coat the edges of the crack with a bonding agent to ensure proper adhesion.
- Reinforce with Fiberglass Mesh: Place fiberglass mesh over the crack to provide added strength and prevent future cracking.
- Apply Stucco Mix: Use a trowel to spread the repair mix over the mesh. Smooth the surface to match the surrounding texture.
- Finish and Cure: Let the stucco cure according to the manufacturer’s instructions. Misting the area during the curing process can enhance durability.
4. Using Acrylic-Based Stucco Repair Products
Acrylic-based products are versatile and suitable for various types of cracks. These materials are flexible and ideal for repairing cracks caused by temperature fluctuations or minor structural movement.
Materials Needed:
- Acrylic stucco patch
- Caulking gun or trowel
- Sponge or roller
Process:
- Clean and Prepare the Area: Remove loose debris and clean the surface with a sponge.
- Fill the Crack: Use a caulking gun or trowel to apply the acrylic stucco patch to the crack.
- Blend Texture: Use a sponge or textured roller to blend the repaired area with the existing stucco.
Allow to Dry: Let the patch dry completely before painting or applying additional layers.
5. Patching with Traditional Stucco
For authentic finishes, traditional stucco patching involves using cement-based stucco similar to the original material.
Materials Needed:
- Stucco repair mix (cement-based)
- Trowel
- Water
- Sponge or brush
Process:
- Clean and Moisten the Area: Clean the crack thoroughly and lightly mist it with water to prevent the stucco from drying too quickly.
- Mix the Stucco: Prepare the stucco mix according to the manufacturer’s instructions.
- Apply the Patch: Use a trowel to fill the crack with the stucco mix. Press firmly to eliminate air pockets.
- Blend the Texture: Use a sponge or brush to match the surrounding texture.
- Cure and Paint: Allow the stucco to cure for at least 48 hours before painting.
6. Professional Stucco Crack Repair
Professional repair is recommended for extensive cracking, multiple cracks, or cracks indicative of structural issues. Experts can assess the underlying cause and use advanced techniques to restore the stucco.
Benefits of Hiring Professionals:
- Proper diagnosis of structural problems
- Long-lasting repairs with high-quality materials
- Aesthetic matching with existing stucco
- Time and cost efficiency for large-scale repairs
Depend Exteriors Offers Stucco Crack Repair in Edmonton
Depend Exteriors Ltd. offers over 13 years of experience in stucco repair and restoration in Edmonton and surrounding areas. We specialize in EIFS systems, stucco patching, and parging to address cracks and damage efficiently. Our family-operated business ensures quality workmanship and customer satisfaction.
- Comprehensive Services: From minor patches to extensive repairs, we handle all aspects of stucco restoration.
- Expert Techniques: Our team uses advanced tools and materials for long-lasting results.
- Local Expertise: We are familiar with Edmonton’s climate and its impact on stucco, so we tailor solutions to meet your needs.
Contact us at (780) 710-3972 for a free estimate and professional guidance on stucco crack repair.
FAQs
Can you repair cracked stucco?
Yes, cracked stucco can be repaired by filling hairline cracks with elastomeric caulk, patching small to medium cracks with stucco repair mix, or addressing larger cracks with reinforced fiberglass mesh and stucco. Proper cleaning and preparation ensure a durable repair.
What is the best filler for stucco cracks?
Elastomeric caulk is ideal for hairline cracks due to its flexibility and durability. For wider cracks, premixed stucco repair compound or acrylic-based patches work best to fill and blend with the existing texture.
When should I worry about stucco cracks?
Worry about stucco cracks that are wider than 1/4 inch, run diagonally, or appear near windows and doors, as these may indicate structural issues. Cracks that allow water penetration should also be repaired promptly to prevent further damage.
How to stop stucco from cracking?
To prevent stucco from cracking:
- Ensure proper application during installation, including adequate curing.
- Seal joints and edges to prevent moisture intrusion.
- Regularly inspect and maintain stucco to address small issues before they worsen.
Can I just paint over hairline cracks in stucco?
Painting over hairline cracks can temporarily hide them, but it won’t stop further cracking. Fill the cracks with elastomeric caulk before painting for a lasting solution to ensure proper sealing and flexibility.


