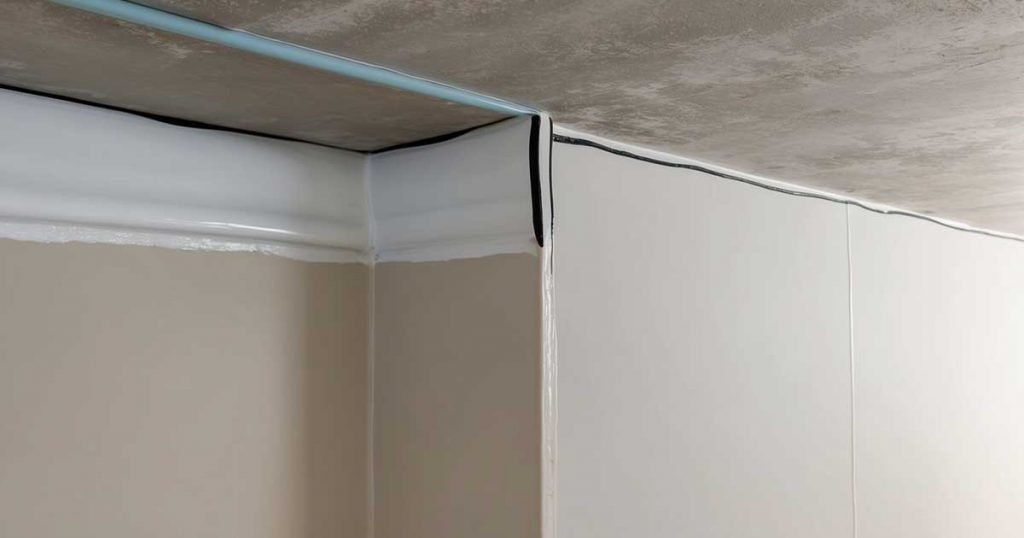
Fix Old Basement Walls
Fix old crumbling basement walls with these steps:
- Identify the Cause of the Crumbling Basement Walls Before Starting Repairs
- Gather Essential Tools and Materials for Repairing Basement Walls
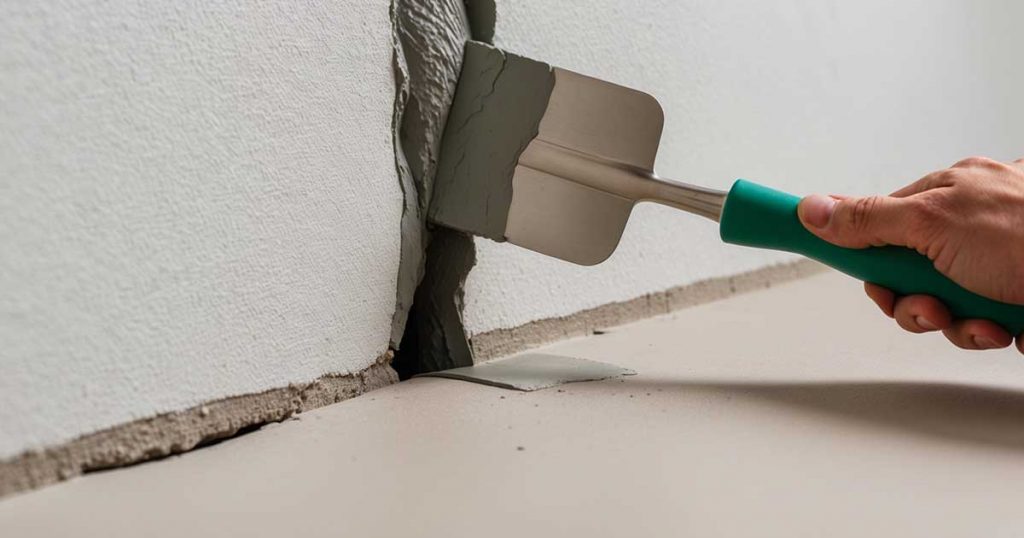
- Remove Loose Material and Clean the Area to Prepare for Repair
- Apply Hydraulic Cement to Seal Cracks and Prevent Water Intrusion
- Rebuild Crumbling Areas Using a Masonry Patching Compound
- Apply a Waterproofing Sealant to Protect the Basement Walls from Future Moisture Damage
- Reinforce and Stabilize Basement Walls If Structural Support Is Needed
- Improve Drainage Around the Foundation to Prevent Future Crumbling
- Monitor and Maintain the Basement Walls Regularly to Catch Problems Early
Click to learn:
- Signs Your Basement Wall Is Crumbling
- Reasons Your Basement Walls Maybe Crumbling
- Tips to Prevent Your Basement Walls from Crumbling
If you still have questions, call us at 780) 710-3972.
1. Identify the Cause of the Crumbling Basement Walls Before Starting Repairs
Before you start any repair work, understand the root cause of the crumbling walls. A thorough inspection will help you diagnose the issue accurately and ensure that the solution you choose effectively addresses the problem.
- Moisture Problems:
- Moisture is one of the most common causes of crumbling basement walls. Look for damp spots, puddles, or efflorescence (a white, powdery substance) on the walls. These indicate that water seeps through the walls, weakening the mortar and concrete.
- Inspect for leaks in the foundation, which may be caused by poor exterior drainage, cracks in the wall, or hydrostatic pressure pushing water into the basement.
- Ensure that the grading around your home slopes away from the foundation, and check if your gutters and downspouts are directing water properly.
- Cracks and Structural Shifts:
- Examine the walls for horizontal and vertical cracks. Horizontal cracks could indicate soil pressure pushing against the walls, while vertical cracks might suggest settling or shifting in the foundation.
- Pay attention to the size and location of these cracks. Large or widespread cracks may indicate significant structural movement that requires professional intervention.
- Use a flashlight and level to detect any bowing or misalignment of the walls, indicating that the foundation is under stress.
- Material Deterioration:
- Older homes may suffer material deterioration due to using substandard concrete or mortar during initial construction.
- Evaluate the surface of the walls to see if the concrete or mortar appears crumbly, porous, or flaky. This could be due to the breakdown of materials over time or the effects of consistent exposure to moisture.
- Check if any portions of the wall feel loose when lightly tapped. This may indicate that the underlying material has lost its structural integrity.
Properly diagnosing the cause of the crumbling will guide you in choosing the right repair method and prevent future issues from developing.
2. Gather Essential Tools and Materials for Repairing Basement Walls
Repairing basement walls requires specific tools and materials to ensure effective and long-lasting results. Having the right supplies ready will streamline the repair process and minimize interruptions.
- Tools:
- Chisel and Hammer: Used to remove loose or damaged concrete and mortar.
- Trowel: Essential for applying patching compounds and mortar to the walls.
- Wire Brush: Helps to scrub off dust, debris, and loose particles from the wall surface.
- Mixing Bucket: For preparing mortar, hydraulic cement, or patching compounds.
- Shop Vac: Cleans dust and debris from the work area, ensuring a clean repair surface.
- Paintbrush/Roller: Needed to apply waterproofing sealant evenly across the wall.
- Materials:
- Hydraulic Cement: Expands as it sets, making it ideal for sealing cracks and stopping water intrusion.
- Masonry Patching Compound: Used to fill smaller cracks and rebuild crumbling sections of the wall.
- Epoxy Resin: Effective for filling hairline cracks and providing extra structural support.
- Waterproofing Sealant/Membrane: Protects the repaired wall from future moisture damage.
- Protective Gear: Safety goggles, gloves, and a dust mask are essential to protect yourself from dust and debris during the repair process.
3. Remove Loose Material and Clean the Area to Prepare for Repair
Proper preparation is key to a successful repair. Removing all loose and damaged material ensures that new compounds and sealants adhere well and provide long-term stability.
- Chisel and Hammer: These tools remove loose or deteriorating concrete and mortar from the wall surface. Work in small sections to avoid damaging stable areas.
- Wire Brush: After removing loose material, scrub the surface with a wire brush to eliminate smaller particles and dust. This step ensures the surface is roughened enough for new material to bond effectively.
- Shop Vac: Use a vacuum to remove all dust and debris. A clean surface is essential for achieving a strong bond with the new repair materials and preventing future issues.
4. Apply Hydraulic Cement to Seal Cracks and Prevent Water Intrusion
Hydraulic cement is ideal for sealing larger cracks and preventing moisture from entering the walls.
- Mix the Hydraulic Cement: Follow the manufacturer’s instructions for mixing, ensuring you achieve a thick, workable consistency. Hydraulic cement sets quickly, so only mix what you can use within a few minutes.
- Apply to Larger Cracks: Use a trowel to press the hydraulic cement into cracks or holes larger than 1/4 inch. Smooth the surface and ensure it fills the gaps. The cement’s expanding nature ensures a tight seal against water intrusion.
- For Smaller Cracks: Use a masonry patching compound to fill minor cracks. This compound is flexible and adheres well, providing a smooth finish to prevent moisture seepage.
5. Rebuild Crumbling Areas Using a Masonry Patching Compound
Rebuilding the wall’s integrity requires careful application of patching compounds to ensure a solid structure.
- Mix the Masonry Patching Compound: Follow the instructions to create a thick, paste-like consistency suitable for filling large gaps and crumbling areas.
- Apply with a Trowel: Press the compound into the damaged areas, using firm pressure to fill and stabilize the sections. Smooth the surface to match the surrounding wall for a seamless finish.
- Build Layers if Necessary: If the damage is extensive, apply multiple layers, allowing each to dry before adding the next. This technique ensures that the repaired section is strong and durable.

6. Apply a Waterproofing Sealant to Protect the Basement Walls from Future Moisture Damage
Applying a waterproofing sealant adds a protective barrier to keep moisture out, extending the life of your repair.
- Select the Right Sealant: Choose a waterproofing sealant specifically designed for basement walls. Epoxy-based or elastomeric coatings work well for added flexibility and durability.
- Apply Evenly: Use a paintbrush or roller to apply the sealant, ensuring full coverage over the entire wall surface. Pay special attention to previously patched areas and seams where moisture could penetrate.
- Allow Proper Drying Time: Follow the manufacturer’s guidelines and let the sealant dry completely. Avoid using the basement until the sealant has cured to ensure full effectiveness.
7. Reinforce and Stabilize Basement Walls If Structural Support Is Needed
Reinforcing measures are necessary to prevent further damage to walls that show signs of structural movement.
- Use Carbon Fiber Straps or Steel Beams: Carbon fiber straps are strong and minimally invasive, suitable for reinforcing walls against lateral pressure. Steel beams offer a more robust solution for significant bowing.
- Attach Reinforcements Properly: Follow professional guidelines when attaching supports, ensuring they are secure and aligned correctly to provide maximum stability.
- Consult a Professional: If the damage appears severe or extends beyond surface issues, consult a structural engineer for an assessment and recommendations on reinforcement techniques.
8. Improve Drainage Around the Foundation to Prevent Future Crumbling
Effective drainage solutions prevent water buildup around the foundation, reducing the risk of future crumbling.
- Adjust the Slope of the Soil: Ensure the soil around your foundation slopes away at a gradient of at least 6 inches over the first 10 feet to direct water away from the walls.
- Install Gutters and Downspouts: Properly functioning gutters and downspouts help divert rainwater far from the foundation. Make sure downspouts extend at least 6 feet away from the house.
- Consider a French Drain or Sump Pump: For basements prone to flooding, install a French drain to channel water away or a sump pump to remove excess water before it enters the basement.
9. Monitor and Maintain the Basement Walls Regularly to Catch Problems Early
Ongoing maintenance is essential to keep basement walls in good condition and to detect any issues before they escalate.
- Periodic Inspections: Inspect walls every few months for signs of moisture, new cracks, or efflorescence. Early detection helps avoid major repairs.
- Manage Humidity Levels: Use a dehumidifier to maintain low humidity levels in the basement, preventing moisture buildup that can weaken the walls.
- Reapply Waterproofing Sealant as Needed: Monitor the sealant’s effectiveness over time and reapply it when necessary to maintain a strong barrier against moisture.
Signs Your Basement Wall Is Crumbling
- Visible Cracks in the Wall
- Horizontal Cracks: Often indicate soil pressure pushing against the wall, which can lead to crumbling over time.
- Vertical Cracks: This may suggest foundation settling or movement, which can compromise the wall’s integrity.
- Stair-Step Cracks: Typically found in brick or block walls, these cracks signal shifting or uneven pressure, leading to potential crumbling.
- Flaking or Spalling Concrete
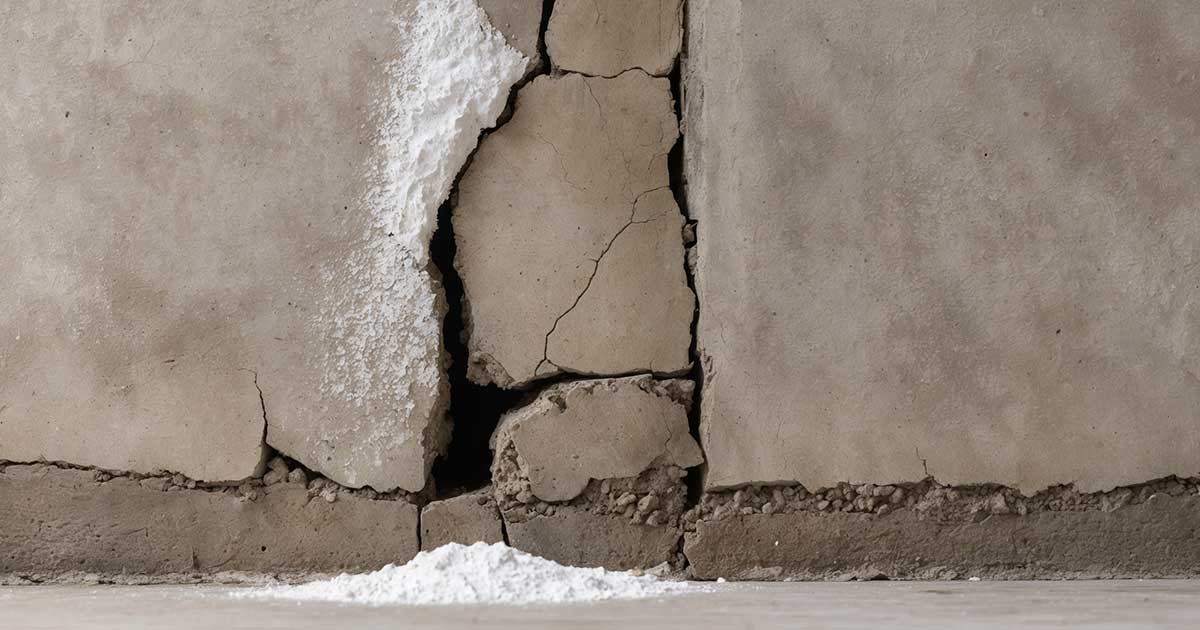
- Surface Deterioration: If you notice pieces of concrete or mortar flaking off, it’s a clear sign of material breakdown.
- Spalling: Larger chunks of concrete breaking away from the wall, exposing the underlying surface, often indicates moisture damage or poor initial construction.
- White, Powdery Deposits (Efflorescence)
- Efflorescence: White, powdery residue on the walls suggests moisture is seeping through and dissolving salts from the concrete or mortar, a precursor to crumbling if not addressed.
- Bowing or Bulging Walls
- Wall Movement: Bowing or bulging walls indicate pressure from the soil outside the foundation. This pressure can cause wall sections to crumble and fail if not stabilized.
- Loose or Disintegrating Mortar Joints
- Eroding Mortar: If the mortar between bricks or blocks is becoming loose or crumbling when touched, the wall is losing its structural cohesion, which can lead to further breakdown.
- Moisture and Damp Spots
- Persistent Dampness: Moist spots or water stains on the walls signal water intrusion. Over time, this moisture can weaken the wall, causing it to crumble.
- Mold Growth: Mold indicates high moisture levels, which can accelerate the deterioration of the wall’s materials.
- Debris at the Base of the Wall
Fallen Pieces: Finding concrete dust, small chunks, or mortar debris accumulating at the base of the wall is a clear sign that sections of the wall are deteriorating and crumbling.

Reasons Your Basement Walls Maybe Crumbling
- Moisture Intrusion: Water seeping through foundation cracks or walls is the most common cause of crumbling basement walls. Excess moisture weakens the mortar and concrete, leading to erosion and structural degradation. Poor drainage, high groundwater levels, or hydrostatic pressure can all contribute to moisture problems.
- Poor Exterior Drainage: Inadequate drainage systems around the home, such as clogged gutters, improperly directed downspouts, or insufficient grading, can cause water to pool around the foundation. This excess water seeps into the walls, weakening the structure and causing the material to break down.
- Freeze-Thaw Cycles: In colder climates, moisture within basement walls can freeze during winter. The expansion from freezing can cause cracks and force materials to break apart. Over time, this cycle of freezing and thawing can lead to significant crumbling and wall damage.
- Foundation Shifts and Settling: Shifting soil or settling foundations can create structural stress on basement walls. This movement often results in cracks and bowing, which compromise the wall’s stability and lead to crumbling, especially if left unaddressed.
- Aging and Material Deterioration: Older homes may have basement walls constructed with materials that degrade over time. Poor-quality concrete or mortar, common in older buildings, can lose its integrity after decades, leading to crumbling and flaking.
- Poor Initial Construction: Substandard construction practices, such as improper mixing of mortar or inadequate reinforcement, can cause basement walls to weaken prematurely. Walls built without sufficient reinforcement may not withstand the pressure from the surrounding soil, causing them to crack and crumble.
- Hydrostatic Pressure: When groundwater levels rise, hydrostatic pressure builds up against the basement walls. This pressure can force water through tiny cracks and pores, weakening the wall’s structure and causing materials to crumble. Improperly waterproofed basements are especially susceptible to this issue.
- Salt and Mineral Buildup (Efflorescence): Water passing through the walls can leave behind salts and minerals, creating a white, powdery substance known as efflorescence. This buildup indicates moisture intrusion, and over time, it can cause the concrete or mortar to deteriorate and crumble.
- Lack of Maintenance: Without regular inspections and maintenance, small issues such as cracks, moisture buildup, or efflorescence can worsen. Ignoring these signs allows walls to deteriorate further, leading to significant crumbling and structural concerns.
Tips to Prevent Your Basement Walls from Crumbling
- Ensure Proper Drainage Around Your Foundation
To prevent water from pooling, slope the soil away from your home’s foundation. Extend downspouts at least 6 feet away from the house and keep gutters clean to direct rainwater properly. - Waterproof Your Basement Walls
Apply a high-quality waterproofing sealant or membrane to the interior and exterior walls. This barrier prevents moisture from seeping into the walls and causing damage. - Install a Sump Pump or French Drain
If your basement is prone to flooding or water buildup, consider installing a sump pump to remove excess water. A French drain system can also effectively channel water away from your foundation. - Control Indoor Humidity Levels
Use a dehumidifier to maintain low humidity in the basement. This helps prevent condensation, mold growth, and moisture damage that can weaken basement walls. - Inspect Basement Walls Regularly
Perform routine inspections to check for signs of moisture, cracks, or efflorescence. Early detection allows you to address small problems before they lead to significant damage. - Reapply Waterproofing as Needed
Waterproofing materials can degrade over time. To maintain an effective barrier against moisture, periodically reapply sealants or membranes. - Maintain Landscaping Around Your Home
Avoid planting trees or shrubs too close to the foundation, as roots can create pressure or cracks in the walls. Ensure that landscaping features do not obstruct drainage or direct water toward your home. - Fix Cracks Promptly
If you notice small cracks in the basement walls, repair them immediately with hydraulic cement or a masonry patching compound. Prompt repairs prevent moisture from entering and causing further deterioration. - Reduce Hydrostatic Pressure on Walls
To minimize the pressure exerted by groundwater, install an exterior drainage system or improve the grading around your foundation. This reduces the stress on your basement walls, keeping them intact.
Use High-Quality Materials During Construction or Repairs
Ensure that any new construction or repair work uses high-quality concrete, mortar, and reinforcements. Proper materials and techniques increase the durability and longevity of basement walls.
Depend Exterior Helps Fix Cracks to Prevent Crumbling Basement Walls
At Depend Exteriors, we specialize in fixing cracks to prevent crumbling basement walls. With over 13 years of expertise, we provide professional stucco repair, parging, and waterproofing services to protect your home from moisture damage.
Our licensed and bonded team ensures durable, long-lasting results, enhancing residential and commercial properties throughout Alberta. Contact us today for a free quote.
Call us at 780) 710-3972.
FAQs
How do you fix old crumbling basement walls?
First, remove loose material using a chisel and brush to fix old crumbling basement walls. Clean the area thoroughly and seal any cracks with hydraulic cement. Apply a masonry patching compound to rebuild damaged sections, and finish by applying a waterproof sealant to protect the walls from future moisture damage.
Can a crumbling concrete wall be repaired?
A crumbling concrete wall can be repaired. The process involves removing loose debris, sealing cracks with hydraulic cement, applying a patching compound, and finishing with a waterproof sealant to restore the wall’s stability and protect it from further deterioration.
Why are my basement walls crumbling?
Basement walls often crumble due to moisture intrusion, poor drainage, or structural shifts in the foundation. Other factors include aging materials, poor initial construction, or exposure to freezing and thawing cycles, all of which can weaken the walls over time.
Can a crumbling foundation be fixed?
A crumbling foundation can be fixed. Repairs may involve sealing cracks with epoxy injections, reinforcing the structure with carbon fiber straps or steel beams, and improving drainage around the foundation to prevent further damage. In severe cases, professional assessment and repair are necessary.
What does a crumbling foundation look like?
A crumbling foundation may show signs of flaking, chipping, or spalling concrete. You may also see horizontal or vertical cracks, loose or crumbling mortar, and visible gaps or uneven surfaces. In severe cases, the foundation may appear bowed or shifted.


