7 DIY Stucco Repair Mistakes Most Edmonton Homeowners Make (Tips Included)
Common DIY stucco repair mistakes often begin with sealing over trapped moisture, skipping primers, using the wrong mixture, or rushing work in bad weather conditions. What seems like a quick fix can lead to cracking, water damage, and peeling finishes once the seasons change.
This guide breaks down how each mistake happens, the warning signs to look for, and why a shortcut can end up costing more in the long run. You’ll also see how professionals handle curing and safety to make repairs last and protect your home through Edmonton’s harsh weather.
If you have more questions or need professional stucco repair in Edmonton, Alberta, call (780) 710-3972.
1. Most Homeowners Trap Moisture Behind the Stucco Finish
The biggest stucco mistake happens when homeowners trap moisture behind the wall during DIY repairs. It often starts when someone patches over a damp area or skips checking for hidden leaks. The surface looks dry, but moisture stays trapped inside. When Edmonton’s winter hits, that water freezes, expands, and causes blistering in the stucco finish.
The trapped moisture rots wood framing, grows mould, and weakens insulation. Homeowners often miss this because they don’t use moisture meters or infrared tools that professionals rely on. Before any stucco repair, the wall must be fully dry, cleaned, and prepped for good bonding.
Professionals test for water infiltration, remove wet material, and rebuild layers correctly so water can escape. Each repairing step matters, from drying to applying new coats. Allow every patch to cure for at least 48 hours at temperatures above 5°C. That care keeps the wall dry, strong, and ready for Edmonton’s harsh freeze-thaw cycles.
2. Skip Primers Before Stucco Repair Causing Cracks
Many homeowners skip primer when fixing stucco cracks, thinking it saves time. That small mistake weakens the bond between the old surface and the new stucco mix. Without primer, the patch doesn’t grip well. As it dries, it pulls away, leaving thin lines or bubbling after the first cold snap.
Primer acts as the glue that holds everything together. Professionals use acrylic primers for acrylic stucco repair and cement-based primers for traditional stucco. Each type helps new material stick firmly and cure evenly. A good primer also reduces dust and prevents early moisture absorption.
Homeowners often mix the stucco through guesswork, resulting in repairs that are too wet or too dry. Always measure carefully, follow product directions, and allow primer to dry for a full day. That proper prep work gives your stucco strength and a lasting bond that resists cracking in Alberta’s changing weather.
3. Mix the Wrong Texture and Colour
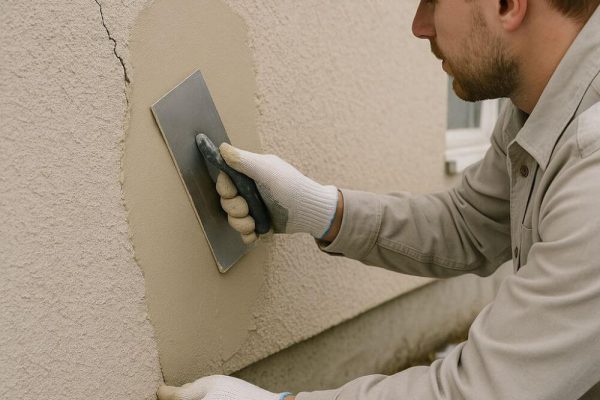
Another common stucco repair mistake is using the wrong mix or matching the texture and colour by eye. Homeowners often patch small areas with leftover materials, unaware that even a slight change in sand or pigment affects the look and cure time. The new stucco patch repair may dry unevenly, show dark stains, or create rough spots that collect moisture.
Each stucco finish has its own recipe and rhythm. Acrylic stucco, cement stucco, and lime stucco all cure differently. Stucco professionals test a small section first, watch how it dries, and adjust the mixture until the texture blends perfectly. We feather the edges and apply even coats to avoid visible lines.
In Edmonton’s dry air and intense sunlight, colour mismatches and rough patches stand out even more. A well-matched stucco repair not only looks better but also prevents water infiltration. Taking the time to get the texture right ensures the repair blends smoothly and protects the wall for years.

4. Apply Sealant Without a Backer Rod
Another mistake is to apply sealant without a backer rod. Caulk alone won’t seal gaps in stucco joints. Skipping a backer rod is one of the biggest stucco repair mistakes you can make. Without it, the caulk sits too deep and stretches too thin. When Edmonton’s temperatures swing from hot to freezing, the caulk cracks, letting moisture sneak behind the wall.
The backer rod works like a cushion. It keeps the sealant at the right depth so it can stretch without tearing. Professionals always insert a foam rod first, then apply flexible, paintable caulk made for stucco systems. This method prevents water infiltration and reduces the risk of long-term damage.
If you skip this simple step, your fresh stucco won’t last through one winter. Water finds its way in, freezes, and causes new gaps around windows and doors. Always prep joints properly and allow at least 24 hours of curing before exposing them to rain or snow.
5. Homeowners Patch Over Control Joints
Control joints may not look pretty, but they help prevent cracking. A serious stucco mistake happens when homeowners patch over these joints, thinking it will make the wall look smoother. When the wall expands and contracts due to temperature changes, that patch blocks movement, causing cracking.
Each joint in your wall acts like a stress reliever. Ignoring joints traps pressure inside the stucco. Professionals know how to re-establish clean joint lines. They use proper metal trims or flexible sealants so the wall can move safely.
In Edmonton’s wide seasonal swings, these joints protect your home from cracking and water infiltration. When repairing stucco, always mark existing joints before you start. Respect those lines; they keep your exterior from splitting apart each winter.
6. Ignore Curing and Weather Conditions During Repairs
Another big stucco repair mistake is rushing the job without watching the weather. Stucco needs time to cure slowly. If the wall dries too fast in sunlight or wind, cracks form. If the temperature drops too soon, the moisture inside freezes, leading to water damage that weakens your wall from the inside out.
Homeowners often try stucco repairs in late fall when nights are already below freezing. The result is brittle stucco that crumbles within months. Professionals know to protect walls with tarps, mist them gently, and allow steady drying for 48 to 72 hours. They also check the humidity and temperature before mixing the material.
Following these steps ensures the stucco patching process is firm and flexible. Good curing means fewer issues, longer life, and no surprise cracking after winter. Always plan repairs during warm, dry weather and never rush the cure to achieve results that last.
7. Homeowners Use the Wrong Tools and Skip Safety When Repairing Stucco
Another mistake is to fix cracks with inadequate tools and without proper safety gear. Many people start repairing stucco using old trowels, rusty floats, or random buckets. This leads to uneven surfaces, weak mixes, and even contamination, which cause future issues or stains.
Professionals always use clean tools, accurate ratios, and proper mixing paddles. They prep the area carefully, removing loose debris before applying new material. They wear gloves, masks, and safety glasses to avoid burns from lime or dust. Homeowners who skip these steps risk injury and ruin the finish by leaving dirt and oil in the stucco mix.
Using the right tools is as important as using the right material. Proper gear ensures smooth, even repairs that protect your home’s envelope. A safe and careful process keeps the stucco finish clean, durable, and free from unnecessary damage.
Avoid DIY Mistakes With Our Professional Stucco Repair in Edmonton
DIY fixes can lead to moisture issues that are expensive to fix. Depend Exteriors offers professional stucco repair that prevents common problems caused by improper mixing or rushed work. Our team restores strength and style to your walls, protecting your home from Edmonton’s harsh weather and long winters. Get lasting results, done right the first time.
Call (780) 710-3972 for professional stucco repair.
FAQs
How to repair stucco damage without making a bigger mistake?
Repairing stucco damage takes more than filling a crack. The key is good prep. The area must be clean, dry, and free of dust before adding a new stucco mix. Always check for hidden moisture issues first, because sealing wet walls traps water and causes bigger damage later. Use a compatible material and allow proper curing time. For large cracks or bulging areas, professional help prevents costly mistakes.
What are the most common exterior stucco repair mistakes?
The most common outdoor stucco repair mistakes include skipping primer, ignoring control joints, and using the wrong mix. Rushing the job or working in cold weather creates weak surfaces that fail during freeze-thaw cycles.
What causes water infiltration after stucco repairs?
Water infiltration often happens when joints, windows, or flashing are sealed incorrectly. Even a small gap lets moisture seep behind the stucco finish and weaken the wall. Skipping backer rods or using the wrong caulk are common stucco mistakes. Once inside, water leads to rot and mould. To stop this, repairs must include proper drainage paths and breathable coatings.
Why does stucco start cracking after repairs?
New cracking usually indicates that the stucco dried too quickly or lacked proper bonding. A missing primer, uneven mixture, or poor curing time causes stress that splits the finish. Moisture behind the surface can also expand and force cracks open during cold weather. Professionals slow down the drying process and monitor temperature and humidity to avoid this. A controlled cure, flexible materials, and solid prep prevent future cracking and extend the wall’s lifespan.
How can I prevent moisture issues?
Preventing moisture issues starts with inspection. Look for dark stains, bubbling paint, or soft spots that suggest trapped water. Before making repairs, ensure the wall is completely dry and properly ventilated. Use primers and finishes that breathe, allowing moisture to escape without soaking into the structure. Seal joints with backer rods and flexible caulk to block water infiltration.
What prep steps prevent future moisture issues in stucco walls?
Preventing moisture issues starts with smart prep. Before applying any new stucco, remove damaged sections and inspect the base for damp spots. Use a moisture meter to detect hidden water. Let everything dry completely, then apply primer and seal joints with flexible caulk and backer rods. Slope trim and flashing away from walls so water drains instead of pooling. Proper preparation keeps moisture from staying trapped and helps your stucco finish breathe naturally, reducing the risk of rot or mould.


