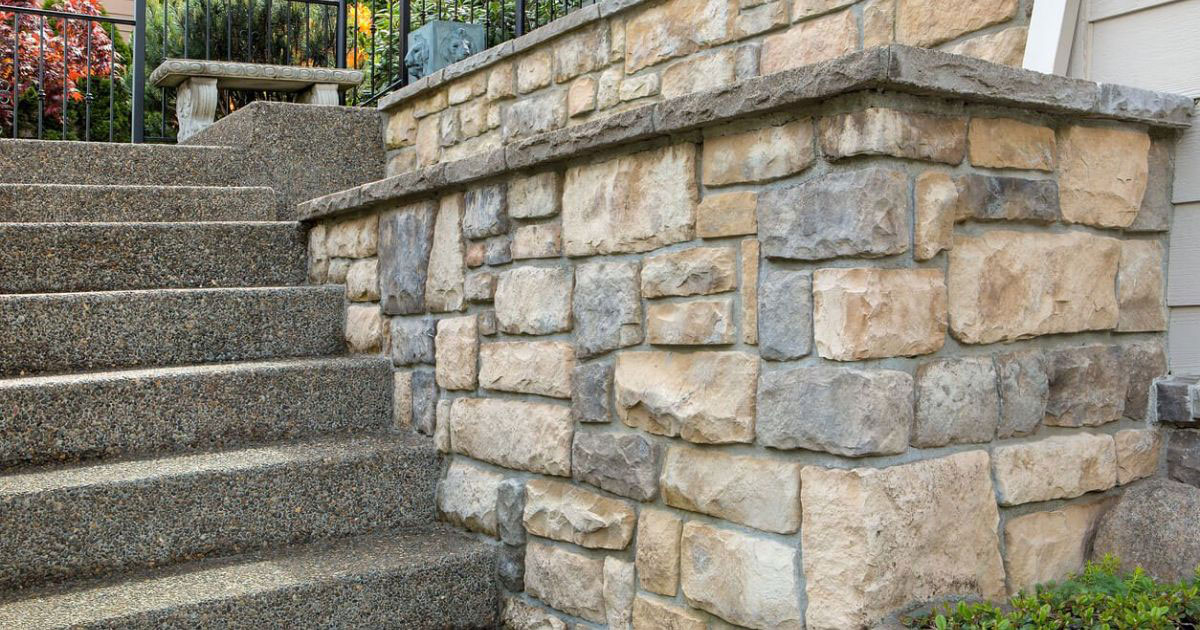
Cultured Stone Installation for Homes in Edmonton
We install cultured stone in these easy steps:
Speak to our cultured stone installers at (780) 710-3972 to learn more about each step.
This guide also covers:
Tools and Materials Needed for Cultured Stonework Edmonton AB
Before your cultured stone installation, our contractor gathers the right tools and materials for a smooth and efficient process. This saves us time and helps avoid unnecessary interruptions.
First, we need a good supply of cultured stone and mortar mix. The mortar mix is the adhesive to secure the stones to the wall.
Next, we’ll need a trowel to spread the mortar evenly and ensure a strong bond between the stone and the surface. A level is essential to keep your work straight and avoid unsightly tilts.
A mason’s hammer or a saw designed for cutting stones will be necessary to ensure your stones fit perfectly. Finally, a grout bag will be useful for applying mortar in tight spaces, providing a neat finish.
Here’s a quick rundown of the essential items:
- Cultured stone and mortar mix
- Trowel
- Level
- Mason’s hammer or stone saw
We can begin your cultured stone installation project with these tools and materials ready.
Our Cultured Stone Installation Process
Step 1:Surface Preparation
Before installing the cultured stone, we need to ensure your surface is properly prepared.
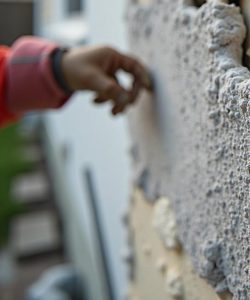
First, we’ll clean the surface thoroughly to remove any dirt or debris.
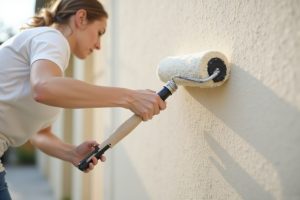
Then, we’ll apply a waterproof barrier to protect against moisture and guarantee longevity.
We Clean Thoroughly Clean the Surface
Our cultured stone installer will ensure the surface is clean. A clean surface is essential for the cultured stone to adhere properly and last long. A clean surface ensures the mortar bonds effectively, providing a solid foundation for the cultured stone.
First, we must remove any dirt, dust, or debris. Here’s what we do:
- Sweep and Dust: We use a stiff brush or broom to remove loose particles and dust the surface thoroughly to eliminate fine particles.
- Wash the Surface: If the surface is particularly dirty, a hose or pressure washer can help. Be careful to let the surface dry completely before proceeding.
- Scrape-Off Residues: We look for old paint, sealants, or adhesives. These need to be scraped off using a putty knife or similar tool.
- We Inspect for Mold or Mildew: Any signs of mold or mildew must be treated with a suitable cleaner. Mold can compromise the integrity of the installation.
We Apply a Waterproof Barrier
We’ll apply a waterproof barrier to the clean surface to protect the underlying structure from moisture damage. This step is essential because it prevents water from seeping into the wall, which could cause mold, mildew, and structural damage.
First, we choose the right type of barrier. A high-quality house wrap or a liquid-applied membrane will do the trick.
We’ll start by measuring the area and cutting the house wrap to size, ensuring it extends a few inches beyond the edges of the surface. We’ll secure the wrap using a staple gun, starting from the bottom and working your way up. This overlap guarantees that water will flow down the wall rather than getting trapped behind the barrier.
If we use a liquid-applied membrane, we’ll need a roller or brush to apply an even coat. Cover every inch of the surface, including corners and edges, to create a continuous waterproof layer.
Once the first coat dries, we may need to apply a second coat for added protection. After the barrier is in place and fully dry, we’re ready to install the lath.
Step 2: Applying the Scratch Coat
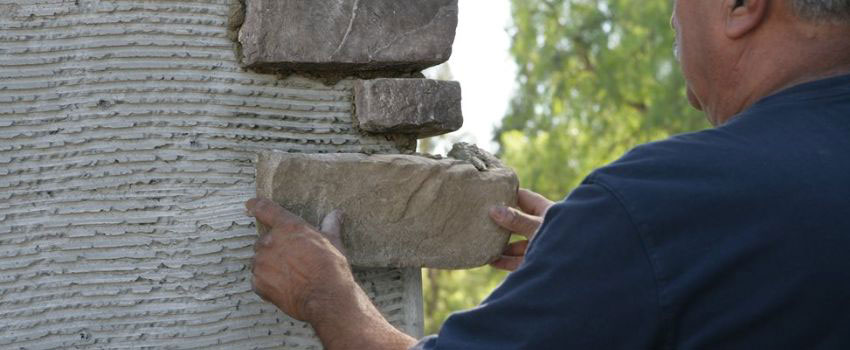
We apply the scratch coat by mixing mortar to a thick, creamy consistency. We want it to be smooth but not runny, guaranteeing it sticks well to the wire lath. Once mixed, we use a trowel to spread the mortar over the surface, pushing it into the lath to create a solid base. It’s important to cover the entire area evenly, aiming for a layer about half an inch thick.
As we apply the mortar, we keep these points in mind:
- Consistency is vital: The mortar should be thick enough to stay in place but workable enough to spread easily.
- Even coverage: Confirm the scratch coat covers the lath uniformly to avoid weak spots.
- Create texture: Score the surface with a notched trowel or rake, providing a good grip for the stone veneer.
- Curing time: Allow the scratch coat to set and cure for at least 24 hours before proceeding.
Step 3: Installing the Stone Veneer
Now that we’ve applied the scratch coat, it’s time to install the stone veneer.
We’ll start by ensuring the surface is properly prepped.
Then, we’ll focus on the proper techniques for applying mortar.
Surface Preparation Steps
A clean and properly prepared surface guarantees that the stone veneer adheres securely and lasts for years. Let’s walk through the essential steps to ensure your surface is ready for the stone veneer installation.
First, we inspect the surface. We ensure it’s free from dirt, dust, and loose materials. If there are any imperfections or debris, we clean them thoroughly. The surface must be structurally sound and stable for a solid attachment.
Next, we’ll apply a weather-resistant barrier. This is vital, especially for exterior applications, as it protects against moisture infiltration. This barrier can be a building wrap or a liquid-applied membrane.
After that, we install the metal lath. This provides a gripping surface for the mortar, ensuring the stone veneer stays in place. The lath should be securely fastened to the surface with galvanized nails or staples.
Finally, we apply a scratch coat. This thin layer of mortar creates a textured surface to which the stone veneer can adhere. We allow it to cure properly before proceeding to the next steps.
Mortar Application Techniques
With the scratch coat fully cured, we apply the mortar and install the stone veneer.
First, we’ll mix the mortar according to the manufacturer’s instructions, aiming for a thick, peanut-butter-like consistency. This guarantees it’s strong enough to hold the stones in place without sagging.
Now, using a trowel, we apply a generous amount of mortar to the back of each stone. It’s crucial to cover the entire surface to guarantee a strong bond. We press the stone firmly into the scratch coat, giving it a slight wiggle to set it in place and remove any air pockets. The mortar should be squeezed out around the edges.
Next, we’ll use a joint tool or your fingers to smooth the excess mortar around the edges of the stone, creating a clean look. If any mortar falls off, we’ll catch and reuse it, preventing wastage.
We’ll work from the bottom up, laying stones in horizontal rows. This approach helps maintain stability and avoids any slipping.
We periodically step back and admire the progress. This way, we can confirm we’re maintaining a consistent look and feel throughout the project.
Stone Veneer Alignment
To guarantee a professional and polished finish, we must carefully align each stone veneer piece as we install it. This step is essential for achieving a seamless and aesthetically pleasing look.
First, we dry-fit the pieces to plan the layout and avoid awkward gaps or mismatched stones.
When we start the installation, we’ll place each stone piece firmly into the mortar, ensuring its level. We check the progress, making sure the stones are lining up correctly. We can use a level or a straight edge to help maintain a consistent alignment throughout the process.
Key alignment tips:
- Start at the corners: We begin installation at the corners and work inward to guarantee a tidy finish.
- Stagger joints: We avoid lining up vertical joints directly above each other to create a more natural appearance.
- Mind the gaps: We keep consistent spacing between stones for a professional look.
- Adjust as needed: If a piece isn’t fitting well, we adjust it immediately before the mortar sets.
Step 4: Grouting and Sealing
Grouting and sealing are vital steps that guarantee the longevity and appearance of your cultured stone installation.
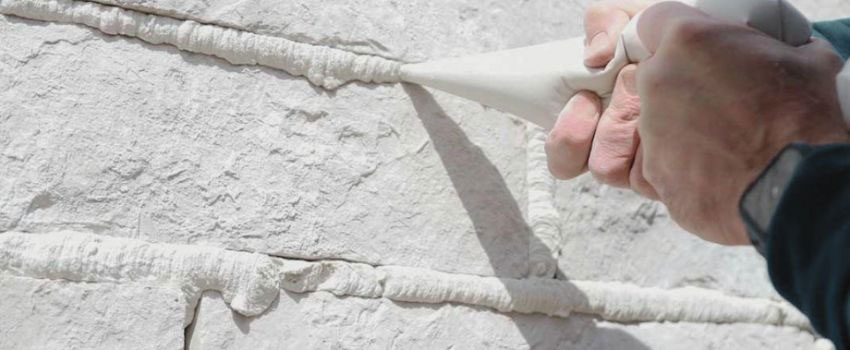
First, we mix the grout according to the manufacturer’s instructions. Getting the right consistency is essential—too thick or too thin can cause issues. Once mixed, we apply it using a grout bag to fill the joints between the stones. We press the grout firmly to avoid any gaps.
After grouting, we’ll use a pointing tool to smooth and shape the grout lines. This step enhances the visual appeal and guarantees a tight seal. We allow the grout to set for the recommended time before proceeding to the sealing process.
We’ll choose a durable stone sealer to protect the surface from moisture and stains. Applying the sealer evenly with a brush or roller is key. We follow the manufacturer’s drying times before exposing the stone to moisture.
Here’s a quick comparison of grout and sealer types:
| Grout Type | Pros | Cons |
|---|---|---|
| Sanded | Strong, durable | Rough texture |
| Unsanded | Smooth finish | Less durable |
| Epoxy | Stain-resistant | Expensive |
Cultured Stonework Maintenance Tips
Regular maintenance is essential for keeping your cultured stone installation looking its best and guaranteeing its longevity.
- Make it a habit to inspect and clean the stone surfaces regularly. This way, you address any issues early before they become bigger problems.
- Ensure you are gentle when cleaning. A mix of water and mild detergent usually does the trick. Avoid harsh chemicals or pressure washers, as they can damage the stone.
- Look for any signs of damage or wear. Cracks, chips, or loose stones should be repaired promptly to prevent further deterioration.
- Also, verify that the sealant is in good condition. If it’s wearing off, reapply it to maintain the protective barrier.
Benefits of Cultured Stone in Edmonton Alberta
- Cultured stone offers durability and aesthetic appeal. You want your home to look great while withstanding the test of time. Cultured stone is manufactured to be incredibly tough, resisting wear and tear better than natural stone. This means fewer repairs and replacements, saving you time and money.
- Additionally, cultured stone offers aesthetic versatility. It’s available in various colors, textures, and styles, allowing you to match it perfectly with your existing decor or create an entirely new look. Cultured stone can adapt to your vision, whether aiming for a rustic, modern, or traditional vibe.
- Another significant benefit is its lightweight nature. Unlike natural stone, cultured stone is easier to handle and install, making the installation process quicker and less labor-intensive. This reduces installation costs and minimizes the physical strain on contractors.
Types of Cultured Stone in Edmonton AB
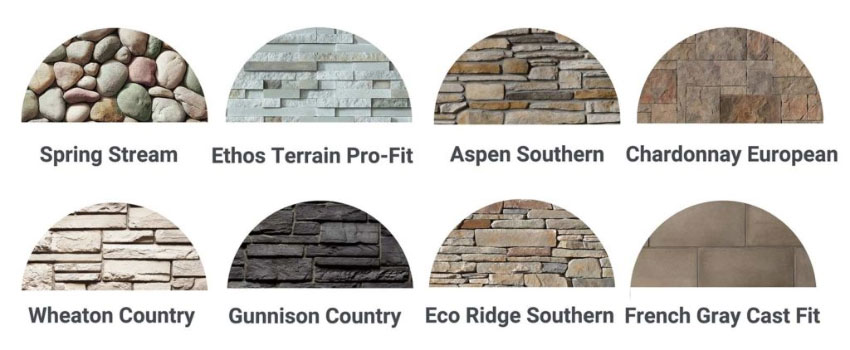
There are different types of cultured stones, each offering unique characteristics and benefits for your projects. Whether you’re looking to enhance the exterior of your home or create a striking interior feature, cultured stonework provides a versatile and cost-effective option.
- Fieldstone: Known for its rugged, natural look, fieldstone is perfect for creating a rustic ambiance. It’s versatile and can be used for both large and small projects.
- Limestone: Limestone cultured stone offers a sleek, contemporary aesthetic. Its uniform texture and subtle color variations make it ideal for modern designs.
- Ledgestone: This type features linear, rectangular pieces that stack easily, offering a clean, organized look. It’s excellent for creating accent walls or fireplaces.
- River Rock: River rock mimics the smooth, rounded stones found in riverbeds, adding a natural charm and making it ideal for water features or garden walls.
Get Cultured Stone Installation Near You
Depend Exteriors offers durable cultured stone installation services in Edmonton and throughout Alberta. Our experienced team enhances residential and commercial properties with durable, aesthetically pleasing cultured stone.
Whether you want to update the look of your home or add a touch of elegance to your business, our cultured stone solutions are designed to suit your needs. With a wide variety of styles and colors to choose from, we can customize the perfect look for your project.
Call (780) 710-3972 for a free estimate and transform your space with professional cultured stone installation.

